Tuesday, 22 October 2013

review: bang restaurant, dublin 2

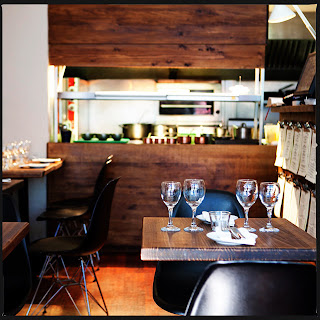
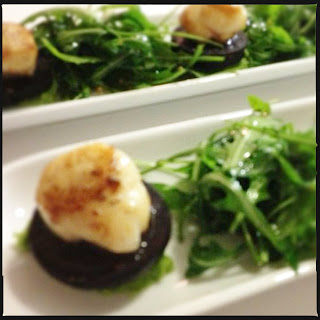
Bang Restaurant, Dublin 2

I have a list of restaurants I want to visit in Dublin, and also all across Ireland! Further afield too actually: Barcelona, London, Paris, Cape Town, Bruges, Amsterdam, New York, Copenhagen, Singapore, Bangkok...

Some are clearly more achievable than others, so I've taken the (sensible) decision to tackle the home-grown ones first.

One on my list is Bang, located close to St Stephen's Green on Merrion Row, and a recent voucher offer from MenuPages Deals meant that it was a step closer. Happy days!


Ms C and I nabbed a deal for the renowned 5-course tasting menu for 2 people at €69 - half the usual price of €69 each, and so we headed down with empty bellies one Friday evening recently.

We arrived in good time, were shown to our table straight away, and were offered drinks. We went for the recommended accompanying wines for the tasting menu (€29.95 per person), and I'm really glad we did, they turned out to be perfect matches. I've never been one for the whole 'drink this with this, eat that with that' thing, but I have to say I may be starting to convert. These were spot on so maybe there's something in that after all...

Ok so I'm just going to reel off the courses given to us, with a comment on each. Suffice to say this was one of the nicest meals I've eaten in a pretty long time. Apart from my own fantastic cooking of course ahem...

We started with an amuse bouche of soft goat's cheese, topped with beetroot and a few other bits & bobs. Really creamy, not too strong or salty, and a lovely way to get the appetite going. This was served with a glass of prosecco from Valdobbiadene in the Treviso province of Italy.

Next up was the fish course, which was house cured Clare Island salmon, served with avocado, radish, cucumber and a ponzu gel which was just tart enough to cut through the sweetness of the other components. Not a huge serving, very delicate and perfectly balanced. As a cheffy type cook, this played as much to my eyes as my palate, and I was left feeling inspired yet again as to how simple presentation is often the best; a feeling I'm getting a lot when dining out lately, such is the standard of Dublin restaurants these days. The wine here was a crisp Sauvignon Blanc (Blanc/Gros Manseng) from the Cotes de Gascogne region.

Meat was next, and time to start getting full! The menu described the dish as Hereford Beef with local celeriac, crispy onion, watercress and horseradish potato. Sounds nice enough, sure, but what Bang fail to mention on the menu is that the beef is slow cooked for around 14 hours. A small detail? I think not. Jeepers creepers, what a piece of meat; I couldn't stop smiling when I tried to cut into it and it just fell apart, and then actually tasting it... I'm drooling just thinking about it! So moist and full of flavour, and coupled with the creamy horseradish mash, a real delight. This was just a fantastic plate of food. Wine with the meat was a lovely full bodied Cabernet Sauvignon from Bordeaux.

Cheeses followed, a hard and a soft (these can vary depending on when you're in), and they were served simply with biscuits, grapes and a fantastic truffled honey. The honey was amazing; I don't know what they did to it but I've never tasted anything so, erm, honey-ey! Absolutely ridiculous. The cheese course came with a lighter red, a Malbec from Argentina.

Finally it was dessert time, and although we'd already eaten four indulgent courses, we were eager to finish off with something just as nice as the previous dishes; expectations were high! Pud came in the form of a chocolate bar, accompanied by mango gel and a mango sorbet. Rich dark chocolate - not too bitter - and the sharpness of the fresh mango, this is a dessert to go on anyone's bucket list I reckon. The final wine was a sweet fruity red dessert wine, almost another part of the dish itself, so yet again a great match.

Service was impeccable throughout, with each dish and wine described in detail to us by the attentive staff. In short this was a great foody night out. Perfect food expertly presented and very well thought out, with each course complimenting the overall menu as a whole.

Now look, I realise €100 a head is a bit on the steep side for most pockets (mine included), but I feel it's worth it, and definitely a place to be recommended for a very special occasion. Or do as I did and keep your eyes peeled for the voucher offer - if you're into your food you won't regret it.

super moist chocolate cake

Super Moist Chocolate Cake

So I'm getting into this baking lark. I like the philosophy behind it all too; a bit of prep, mix stuff together, throw it in the oven, sit back and wait for the thing to cook itself. Hmmm, that might not be exactly how it is in reality it seems...

Arguably easier than making a tart for dessert (no pastry, no blind baking, all that malarkey) I decided to try and perfect the humble chocolate cake. What could be simpler thinks I? Well, very recent experience tells me many things could be simpler actually.

I did make a few chocolate sponge cakes when testing this out, and all of them were pretty much edible. The problem I had was that they weren't perfect. Sinking, cracking, refusal to set, refusal to leave the tin; these have been some of the problems I've faced over the last couple of weeks. The biggest issue I've had however is getting the thing moist enough. I'm glad to report I've fixed this though!

Follow this recipe and you'll get a fantastically moist and tasty chocolate cake every single time; really straightforward too (I think?!). And thank goodness for that...


Ingredients

  • 250g self-raising flour
  • ½ tsp bicarbonate of soda
  • 3 tbsp cocoa powder
  • 300g caster sugar
  • 2 medium eggs, beaten
  • 1 tsp vanilla extract
  • 250g butter
  • 200ml cola
  • 220ml full-fat milk


Method
  1. Preheat the oven to 180c / 160c (fan) / gas mark 4. Grease a 24cm deep cake tin with butter or a light coating of sunflower oil and line it with greaseproof paper.
  2. Sift the flour, bicarbonate of soda and cocoa powder into a large mixing bowl.
  3. Add the eggs, sugar and vanilla extract and beat well with an electric mixer.
  4. Melt the butter in a saucepan over a low to medium heat. Stir the cola into the butter then stir in the milk. Remove from the heat and leave to cool slightly for 2 or 3 minutes.
  5. Gently whisk the wet mixture into the dry ingredients and pour into your greased tin.
  6. Bake for around 40 minutes, until a skewer or small sharp knife comes out clean when inserted into the centre.
  7. Remove from the oven and cool in the tin for 10-15 minutes. Carefully remove the cake from the tin , remove the greaseproof paper.
  8. Stand back in amazement, dive in. And remember to come up for air every now and again. Oh and if you can bear it, share the thing; that's a lot of cake for one person and you can win some serious brownie points with this one...


    Monday, 21 October 2013

    review: jamie's italian, dundrum

    Jamie's Italian Ireland, Dundrum
    Opened just over a year ago in September 2012, Jamie's Italian is clearly doing something right. Serving great food cooked to order from fresh ingredients in a really cool restaurant might have something to do with it! Jamie Oliver was my first 'food hero', so I was really looking forward to this!

    I was lucky enough to be invited to sample the goods one lunchtime after responding to a post on the restaurant's Twitter page; talk about an added bonus! To be honest, the quality of the food is such that I've have gladly paid for it - maybe I should have mentioned that to Andrew, our host, and Jamie's Italian General Manager.


    The menu offers a huge range of authentic-sounding dishes, and every one of them sounds fantastic - a real problem when you're hungry and like to eat everything! This was our first time here, and not being so sure about portion sizes we opted to share a starter. We went for the crispy squid; that was down to us both reminiscing about our trip to Barcelona last year and wishing we were still there...

    The squid was perfectly cooked and not chewy at all, and came served with a lovely garlic mayonnaise and some fried garlic and red chilli, and really hit the spot. At first we thought the portion size may have been a little small, but then reminded ourselves that this was an antipasti dish, not a starter, so all good. Definitely a dish to be recommended and great to whet the appetite. Maybe best to have it to yourself though; too tasty to share!

    We ordered a couple of glasses of vino too, a lovely pinot grigio, Delle Venezie. Nice & crisp, and perfect for Italian cuisine. Lovely.

    Mains were next. Ms Chefilepsy opted for the Honeycomb Cannelloni Three Ways, a lovely dish with freshly made pasta covered with tomato sauce and filled with a combination of aubergine & sun-dried tomato, pumpkin, and ricotta & spinach. I went for one of the daily specials, which was a whole roasted sea bream, served with garlic, Heritage tomatoes, olives and a lovely light sauce. The fish was cooked perfectly and was really tasty; both mains really delivered.

    Being guests of the house we thought it rude to not indulge in a couple of desserts; well you would wouldn't you?! Ms C chose three scoops of ice cream, topped with crushed nuts and seasonal berries - delicious. I went for the panna cotta, which was served with a seasonal fruit compote. Lovely and packed with fresh vanilla, it had the flavour (and the wobble) I love. So, more ticks in more boxes!

    All-in-all this was a well balanced lunch, and could have just as easily been enjoyed in the evening for dinner. The food is just great and comes highly recommended as one of the few places I've found in the Dublin area to offer genuine-tasting Italian food (and without the menu just being limited to the standard pizza and pasta options). The atmosphere and buzz of the place is great too; the sound of loads of people chatting, along with the clatter of cutlery, is really infectious, and is spot on for this type of setting.

    Getting to the restaurant is easy too. We took the Luas from the city centre (green line) and the journey only took around 15 minutes. If you're driving that's just as simple, with loads of parking available within the Dundrum Town Centre complex.

    Well done and thanks again to Andrew & the whole team; we were left wanting for nothing and I for one can't wait to head back.

    Honeycomb Cannelloni Three Ways

    Whole roasted sea bream, garlic, Heritage tomatoes and olives
    Vanilla ice cream, crushed nuts and seasonal berries


    Panna cotta with seasonal fruit compote

    Jamie's Italian
    Unit 1
    Pembroke District
    Dundrum Town Centre
    Dublin 16, Ireland
    www.jamieoliver.com/italian/ireland/
    https://twitter.com/JamiesItalianIE
    +353 (1) 298 0600

    Monday, 7 October 2013

    simple soda bread

    Simple soda bread

    I cook. That's what I do. Usually savoury recipes, usually starters & mains, occasionally a dessert or two. Baking has always evaded me; or more accurately, I've always evaded baking! The fear of the unknown I guess? Don't get me wrong, I can make a decent bit of shortcrust pastry for a fantastic lemon tart (recipe to follow!), but bread has always been something I've bought rather than made. Time for that to change!

    So here we go, head first into the world of bread making. We're starting with arguably the simplest of all: soda bread. No yeast, no kneading, no proving, no knocking back; in fact not much of anything, and ready to eat from start to finish in less than an hour - my kind of bread recipe indeed!

    Thanks to Easy Food Magazine for this recipe from their latest issue!


    Ingredients
    • 500g plain flour
    • 400ml buttermilk
    • 2 tsp bicarbonate of soda
    • 1 tsp salt


    Method
    1. Pre-heat the oven to 200c / 180c (fan) / gas mark 6.
    2. Sift the flour, bicarbonate of soda and salt into a large mixing bowl.
    3. Make a well in the middle and pour i the buttermilk.
    4. Mix gently together with your hands until well combined.
    5. Lightly flour a large surface and plonk the mixture onto it. Knead for 30-60 seconds, just to bring it together, and form into a round shape.
    6. Place the bread onto a lightly floured baking sheet (or alternatively line with a piece of baking parchment) and place the bread in the middle.
    7. Flour the blade of a knife and cut a cross across the top of the bread, around 2cm deep.
    8. Place in the middle of the pre-heated oven and bake for around 45 minutes.
    9. Check the bread is cooked by tapping the bottom of the loaf - it should sound hollow. If it does, it's done.
    10. Hey presto; you've just made bread.


      Monday, 30 September 2013

      pan-seared pigeon breast with roast apples, black pudding & cider reduction

      Pan-seared pigeon breast with roast apples, black pudding & cider reduction


      Game season is under way again in Ireland and butchers are now starting to stock all of those richer meats we see in the Autumn & Winter months. Venison is back in town, as is pheasant, wild boar, partridge, quail... This dish uses pigeon; a lovely dark rich meat with virtually no fat, and cheap too; the 4 breasts I used here only set me back around €8!

      This is a great starter, packed with flavour and leaving you wanting more every time!


      Ingredients


      • 4 pigeon breasts
      • 100g black pudding, diced
      • 1 Granny Smith apple, cored, peeled & cut into 8
      • 200ml dry cider
      • 2 tbsp duck fat
      • 20g butter
      • Salt & pepper


      Method
      1. Pre-heat the oven to 180c / 160c (fan) / gas mark 4.
      2. Heat a non-stick frying pan over a medium high heat and add 1tbsp duck fat and the butter.
      3. Season the apple pieces with salt & pepper & fry for 1 minute on each side until just starting to colour slightly.
      4. Transfer the apple to a non-stick baking tray and place in the oven. Cook for 10 minutes.
      5. Meanwhile, add the other half of the duck fat into the frying pan and fry the black pudding for 3 or 4 minutes. Drain on kitchen paper then place on a second baking tray and place in the oven for 7-8 minutes.
      6. Season the pigeon breasts on both sides & fry for 1 minute, skin side down. Turn over, add the cider and cook for another 2 minutes.
      7. Remove the breasts from the pan and set aside to rest.
      8. Turn the heat up in the pan and reduce the cider by around half.
      9. To serve, place the apple pieces in a bowl or on a plate of your choice. Slice the pigeon breasts into 5 or 6 pieces each and place on top of the apple. Sprinkle the black pudding over and spoon over the sauce.
      10. I also finished mine off with some posh micro herbs; in this case it was red stem radish, but pea shoots would be lovely too.
      11. Enjoy!


      Serves 2

      Tuesday, 24 September 2013

      pan-fried squid & chorizo with heritage tomato & feta salad

      Pan-fried squid & chorizo with heritage tomato & feta salad

      Here's a healthy Mediterranean type option for those of you who, like me, still wish they were on holiday having long lazy lunches somewhere hot and sunny without too much of a care in the world...

      This light dish started off life as a 'let's-see-what-we've-got-left-in-the-fridge' plate of food, when I fancied a starter to pre-empt the chicken dish I was cooking as my main course. The resulting meal was VERY tasty, so of course I had to share! As you can see from the photo, it looks great too; really vibrant with loads of colour, and of course the flavours are just beautiful together.

      Quick to prepare, and even quicker to cook and plate up, leaving you plenty of time to slow down and enjoy with a large slurp or two of cold dry white wine...


      Ingredients

      For the squid
      • 2 x squid (tubes/bodies only), cleaned, halved along each side and cut into thin strips widthways
      • 1 x chorizo sausage, diced (I used Gubbeen chorizo from Cork, keeping it local!)
      • Olive oil
      • Squeeze of fresh lemon juice
      • Salt & pepper

      For the tomato salad
      • 2oog (approx - I used 2 - 3 good handfuls) Heritage (a.k.a. Heirloom) tomatoes, sliced
      • 80g feta cheese, diced
      • Good handful of freshly chopped parsley
      • 1 clove of garlic, finely sliced
      • 2 tbsp extra virgin olive oil
      • Squeeze of fresh lemon juice
      • Salt & pepper


      Method
      1. First make the salad. Throw everything into a bowl and season to taste with the lemon juice, salt & pepper. Leave to one side for the flavours to combine a little.
      2. Heat a non-stick frying pan over a medium-high heat and add the chorizo. Cook for 4 or 5 minutes until the sausage starts to colour and release some of its oils.Remove from the pan and drain on kitchen paper.
      3. In the same pan, add a small splash of olive oil and throw in the squid pieces.
      4. Stir regularly and again, season to taste with the lemon  juice, salt & pepper.
      5. When the squid is cooked (but still nice & tender) add the chorizo back into the pan for 30 seconds to warm through.
      6. To serve, divide the squid & chorizo into two portions, placing in the centre of each plate.
      7. Place the tomatoes randomly around the outside of the plate and drizzle over the dressing.
      8. Eat as slowly as you can to maximise the enjoyment. It might also be worth trying to convince your dining partner that they don't like it that much so you can steal theirs as well. Good luck with that...

      I ate this last night for the first time and even just typing up the menu I'm drooling! That must say something about how nice it is, right?! I have to say, absolutely delicious...

      Serves 2

      Wednesday, 18 September 2013

      pan-fried sea bass with beurre blanc & roasted mediterranean vegetables

      Pan-fried sea bass with beurre blanc & roasted Mediterranean vegetables

      Hi everyone!

      I know, I know; it's been soooo looooong since I last posted, and for this I apologise. No excuses, aside from to say I've kind of been out of commission for the last couple of months doing lots of cheffy, cooky things. Can't divulge too much about that just yet, but suffice to say it's VERY exciting stuff, and of course I'll be giving more details in due course!!

      Vague enough? Yep thought so. On with the food...

      Once again, I've tried to put a dish together with swanky-but-inexpensive in mind, with taste and flavour still sitting pretty in first position, as always. This is a lovely dish, very simple, full of flavour, healthy (well, ish - ignore the mountain of butter in the sauce), and won't break the bank. You can substitute the bass for most other fish too, such as pollock, hake or cod, and it also works extremely well with salmon or sea trout.

      This recipe makes for a nice starter or a light lunch/supper, but if you want to ramp it up as a main, you could just sit the fish on some sautéed potatoes and increase the amount of vegetables you plonk on the plate. Easy!

      Finally, one more shout out for my good buddies at Kish Fish in Smithfield for selling me the beautifully fresh sea bass.


      Ingredients

      For the bass
      • 2 fillets of sea bass
      • Salt
      • Pepper

      For the Mediterranean vegetables
      • ¼ courgette, cut into bite-size pieces
      • ¼ aubergine, cut into bite-size pieces
      • ¼ red pepper, de-seeded & cut into bite-size pieces
      • 2 tbsp olive oil
      • Salt
      • Pepper

      For the beurre blanc
      • 2 shallots, finely chopped
      • 60ml white wine
      • 60ml white wine vinegar
      • 125g unsalted butter, cut into cubes


      Method
      1. Preheat the oven to 180c / 160c (fan) / gas mark 4.
      2. Place the vegetables in a small roasting tray and toss with the olive oil, salt & pepper, to coat.
      3. Place in the oven and roast for around 30mins, until soft (but not mushy!).
      4. For the beurre blanc, place the shallots, vinegar & wine in a small saucepan and heat over a medium heat until only around a quarter of the liquid remains.
      5. Lower the heat to its lowest setting and whisk in the butter, one cube at a time until each one has been incorporated into the liquid. Keep warm.
      6. For the bass, heat a non-stick saucepan until hot. Season the fillets lightly on both sides - do this the last minute before adding to the pan so you don't draw all of the moisture out of the fish.
      7. Add 1 tbsp of olive oil and place the fish in the pan, skin side down. Hold down for a few seconds to prevent the fillets curling up (or - chef's tip - place a saucer on top of the fish for a minute or so to weight it down).
      8. Once the skin is coloured and nice & crispy (approx. 3 minutes), turn of the heat & turn the fish onto the flesh side. Cook for a further minute (maximum) and remove to rest for around a minute.
      9. To serve, place the fish in the middle of a plate, skin side up. Spoon the sauce all around and place the vegetable pieces around.
      10. Take a photo, post it everywhere, wait for the ooh's and ahh's... Oh yep, and enjoy!

      If you have some nice dry white wine, pour yourself a glass to have with this dish. If not - buy some!

      Serves 2

      Tuesday, 25 June 2013

      pork belly with black pudding, scallops, fondant potatoes, oyster mushrooms and wild garlic


      With the starter out of the way, next up was the main course; the main event of the meal, and expectations were high. Not that I was panicking or anything of course, but I started this dish at around 10am!

      Preparation is the key here. The pork is cooked, cooled and cooked again, and there's a fair bit of last minute flying around before plating up, but thankfully the end result tastes like a little bit of heaven. I love all of these ingredients, and together they're just perfect. Loads of different flavours, half a dozen different textures, and a real showcase of a meal to impress even the in-law-est of in-laws!

      Enjoy making this; you'll get a real sense of achievement as a cook and what you end up eating is guaranteed to be one of the nicest meals you've produced all year!


      Ingredients

      For the pork belly
      • 1kg - 1.3kg pork belly, bones/ribs removed. skin scored
      • Handful of fresh thyme sprigs
      • 2 bulbs garlic, halved horizontally
      • 350ml white wine
      • 500ml warm chicken stock
      • Olive oil
      • Sea salt
      • Freshly ground black pepper

      For the fondant potatoes
      • 3-4 large potatoes, peeled & cut into 4cm cubes (2 cubes per person)
      • 150g butter
      • 75ml chicken stock
      • 2 sprigs fresh thyme
      • 2 garlic cloves, crushed/broken slightly with a knife
      • Sea salt
      • Freshly ground black pepper

      For the rest!
      • 8 slices black pudding
      • 8 scallops, cleaned & patted dry
      • Good handful of oyster mushrooms
      • 2 tbsp butter, diced
      • Olive oil
      • Good handful of wild garlic
      • Sea salt
      • Freshly ground black pepper


      Method
      1. For the first stage of the pork belly, preheat the oven to 180c / 160c (fan) / gas mark 4.
      2. Season the pork with salt & pepper on both sides and rub with a couple of good glugs of olive oil.
      3. Place the garlic in a roasting pan, cut side up, and cover with the sprigs of thyme. Place the pork belly on top, skin side up, and pour around 250ml of the wine around the edges into the pan.
      4. Cover loosely with tin foil, cook the pork for 2 hours before resting on a board for 10-15 minutes.
      5. Place the pork in a clean tray or dish, with another on top. Weight it down (cans of food are good for this) and leave to cool for around 3-4 hours.
      6. The gravy comes next! Place the original roasting tin on the stove top over a medium-high heat and deglaze with the remaining 100ml of wine. Reduce for 3-4 minutes then add the stock and reduce again by half, making sure you break the garlic & thyme down as much as possible with a wooden spoon to get all the flavour out.
      7. Sieve the sauce into a jug and set to one side for reheating later when plating up.
      8. When the pork is cooled (and a lot flatter), divide it into 8 equal portions and get the oven up to its highest setting (around 220c). When the oven is nice & hot, cook the pork skin side up on the top shelf until the skin crisps up (around 15 minutes or so).
      9. In the meantime, you can deal with the fondant potatoes. Put the butter into a saucepan & heat until foaming. Place the potatoes in and cook for around 5 minutes, until they start to turn a nice golden brown. Turn over and cook for another 5 minutes before adding the stock, garlic and thyme sprigs. Cover & reduce the heat slightly, and simmer for another 5 minutes or so, until the potatoes are tender.
      10. For the mushrooms, just fry in some olive oil with a little black pepper until cooked through & tender.
      11. Next up is the black pudding. Heat a little olive oil in a non-stick pan, add the black pudding and fry for 2 minutes on each side until crispy. Remove from the pan & place to one side on a warm plate.
      12. Season the scallops lightly with salt & pepper. In the same pan as you cooked the black pudding, add a little more oil and when nice & hot add the scallops and cook for 30s-60s on each side. The time will depend on the size of your scallops, but you're looking for a nice brown sear before turning.
      13. Finally, sauté the wild garlic in a knob of butter until nicely wilted. You should also reheat your sauce at this stage - in a microwave will do, especially as you probably don't have any clean pans left by now!
      14. To serve, place two pieces of pork belly on each plate, then two pieces of black pudding with a scallop on each, and two potatoes with a couple of the mushrooms on top. Place your wild garlic in the middle of the plate & pour the sauce into the gaps in between it all!
      15. This is a fair bit of faffing around; I do understand that, but trust me, it's very much worth every second!
      The dish is lovely served with pretty much any wine too! Red is great with the pork and black pudding, white is great with the potatoes, pork, scallops & black pudding, and rose is great with everything!

      Enjoy!

      Serves 4

      Tuesday, 18 June 2013

      pan fried sea bass with carrots, leeks & caper butter sauce


      The outlaws were heading into town.

      Wait, let me start that again...

      My girlfriend's lovely parents were coming round for dinner.

      Unfortunately for me, my cooking has been bigged up somewhat by my loved one (and admittedly, also by me), so I had quite a lot to live up to. As you know, I always try to come up with dishes that have the look, feel & taste of restaurant standard plates of food, but which don't break the bank, so this was my chance to go with that & give la familia something very special without having to use any ingredients that rhyme with 'mobster'.

      Vegetables are always a good option. They're cheap, versatile, tasty, and good for us! So they were on the shopping list without a second thought. The nice people over at Kish Fish in Smithfield had also just sent me a text message informing me that sea bass fillets were on offer, so that also seemed like a no-brainer - who doesn't like fresh, simply-cooked fish, right?! And as we know, many people have the notion that fish is ridiculously difficult to cook - when in fact it's one of the simplest (shhh don't tell anyone!), so always a good one when trying to impress an Irish Mammy...

      Then I just needed a sauce. Butter sauces are light, so great with fish dishes like this. The lemon is lovely with the bass, and the capers add a nice bit of zing against the sweet vegetables.

      Try this dish out, and if you can't get hold of sea bass, go for whatever fish you can - trout, salmon, mackerel etc; they all work just as well.

      Suffice to say, The Parents were suitably impressed, and loved the food. Phew! Ah but then there was the main course...

      Enjoy!


      Ingredients
      • 4 fillets sea bass, cut into 2 or 3 pieces each
      • 4 medium carrots, peeled & cut into matchsticks
      • 1 large leek (or 2 medium), cleaned & cut into matchsticks
      • Juice of ½ lemon
      • 150g butter, diced
      • 2 tsp capers, drained
      • 2 tbsp vegetable oil
      • Small handful of samphire, to serve (optional)


      Method
      1. Heat a large sauté pan (or deep frying pan) over a medium-high heat, add 100g of the butter and throw in the leeks & carrots. Sauté for 5 minutes or so, until starting to soften. Lower the heat to keep warm & soften a little more, whilst you cook the fish.
      2. Heat a separate non-stick frying pan until hot. Season the fish lightly on the flesh side with a little salt (not much), and add the oil to the pan.
      3. Carefully place the fish in the pan, skin side down, being careful not to splash yourself with the hot oil (lay the fish away from you to prevent this).
      4. Press the fillets down for a few seconds if necessary to stop them curling up and stay nice & flat - this helps give you a lovely crisp skin. If you're having the samphire, blanch this in boiling water now for around a minute or so until softened, then drain and put to one side.
      5. When the skin has coloured and crisped up, turn the fish and cook for another minute or so on the flesh side, until cooked through. Remove and place on a warm plate.
      6. In the same pan as you cooked the fish, add the remaining 50g of butter and add the capers. When the butter has melted, squeeze in the lemon juice and mix together gently to ensure all the capers have taken on the flavours.
      7. To serve, spoon the carrot & leek mixture onto a plate and place the sea bass on top before spooning over the caper butter.
      8. Finally, to finish off the samphire, just throw it into the remainders of the caper butter and stir around for a few seconds until warmed through. Place on top of the plate, and of course, don't forget to arrange pretentiously!
      This is lovely with a nice big glass of cold, dry white wine - which is also useful for drowning your sorrows once you start wishing you'd have made more!

      Serves 4

      Tuesday, 30 April 2013

      chicken liver pâté

      Chicken liver pâté

      Simple, cheap as chips (cheaper than chips actually!), and one of tastiest things you'll ever cook! That's just how I'd describe this recipe for my chicken liver pâté. No more to be said really, just get cracking, grab some crusty bread, and see if you can stop eating it once you start!


      Ingredients
      • 1 tbsp olive oil
      • 150g bacon lardons
      • ½ onion, finely chopped
      • 2 sprigs thyme, leaves only
      • 2 cloves garlic, finely chopped
      • 500g chicken livers
      • 3 bay leaves
      • 1 shot glass brandy (optional but also very necessary!) 
      • 120g softened butter, cubed

      For the topping:
      • 110g clarified butter
      • 6 small sprigs of thyme


      Method
      1. Heat the oil in a large frying pan and cook the bacon, onion, thyme and garlic until the onions have softened and the bacon is cooked (don't colour it).
      2. Add the chicken livers and bay leaves. Turn the heat up a little & cook for about 4 minutes, until the liver is browned on the outside but still soft/pink in the middle.
      3. Pour in the brandy, light it & let it burn off (stand back), then simmer for around 3 minutes.
      4. Take off the heat, take the bay leaves out and leave to stand for a couple of minutes.
      5. Spoon into a food processor and pulse a few times to get a rough pâté look. Add the butter a little at a time and blitz in each time, until it's all well mixed & the pâté is smooth-ish (or to whatever consistency you prefer). Season with salt & pepper if needed (probably won't be, especially if the bacon was smoked).
      6. Divide the mixture between six ramekins/pots/cups/whatever. Allow to cool for a few minutes and stick in the fridge for a couple of hours.
      7. Clarify the butter but placing in a small saucepan over a medium heat until the solids separate (the white stuff). Sieve off through a fine sieve and keep the golden (clarified) liquid butter.
      8. Take the pâté out of the fridge, sit a little sprig of fresh thyme on top of each and cover the pate with a layer of clarified butter. Stick back in the fridge for another 3 or 4 hours.
      9. Eat. Get fat. Don't really worry about that. Eat a bit more.
       

      Thursday, 25 April 2013

      review: camden kitchen, dublin 8

      One year. One whole year. That's how long it is since I first met my lovely lady. Thankfully I was allowed to give the knife a rest for one evening and head out for dinner to celebrate the occasion. I live in a great part of town, just south of the centre, surrounded by pubs, cafés, and of course restaurants. And so off we went to our favourite: Camden Kitchen.

      Camden Kitchen, Dublin 8The restaurant itself is a perfect mix of cool bistro and fine dining, with a comfortable atmosphere; not one of those places where you feel you shouldn't cut your food too loudly. The staff are friendly and attentive, but not overbearing, and are knowledgeable about the lovely food they professionally deliver to the hungry.

      The wine list offers a good variety of reds, whites & sparkly stuff, with prices to suit all pockets too: for example, whites range from €23 to €49 a bottle, with most also served by the glass. If you can't choose, just speak to someone for a suggestion based on what you're going to be eating.

      And that leads us to the food...

      Head chef & owner Padraic Hayden and his small team offer up a veritable feast of what he describes as "Modern European" dishes, locally sourced where possible (including a bit of foraging, fair play), and always seasonal. Big flavours, perfect balances, and presented oh-so-prettily, this is serious food that just won't allow you to stop eating it!

      We started off in true celebratory style with a couple of champagne cocktails whilst we mulled over the menu. A Kir Royal for me and a Bellini for her majesty. A bit of fizz is always good for getting the appetite going I reckon - not that we needed any encouragement! They went down veeery well...

      We ordered food and water and started trying (unsuccessfully) not to eat all of the lovely bread. Wine was on its way too; a bottle of 2009 Sancerre, Domaine des Brosses, at €39.

      Starters arrived and whilst I resisted the temptation to take photos (a personal first), I did resist the temptation to dive in all guns blazing. For around 2 seconds...

      Miss Chefilepsy went for the natural smoked haddock croquette, which came served with smoked salmon & spring leaves. Pretty as a picture, and tasty as a very tasty thing indeed. Good job.

      I opted for the special: gambas & chorizo with lemon, garlic, croutons & salad leaves. The smell was just amazing, and transported me back to my years living in Spain. And when I say gambas, we're not talking piddling little prawns here. These were serious monsters, served grilled in their shells, and came with a finger bowl for the clean up operation afterwards - good thinking guys! This was a huge portion (I think I counted 10 of these dudes, maybe more); a couple more and it would have made a substantial lunch dish! These beasts are light though so no complaints here. Moreish, full of flavour, and fresh as the proverbial daisy.

      Smile planted firmly on my face, onto the main event. Organic salmon fillet, wild garlic gnocchi, clams & cauliflower tempura for me; dry-aged Maurice Kettyle beef rib eye served with ox cheek, potatoes & roasted shallot for the ladyfriend. We'll start with my salmon...

      Beautifully just-cooked flesh, crispy skin; just wonderful. The wild garlic gnocchi was a revelation; bright green in colour and piped out like puréed potato with everything sitting atop, the taste was subtle with just enough garlic flavour so as to compliment - not dominate - the rest of the food. The cauliflower was crispy on the outside and cooked perfectly, with a delicate crunch to the vegetable. Overall a lovely, lovely plate of food.

      Miss C's rib eye was a more robust looking dish, yet still with the refinement I've come to expect of these top eating joints. Wonderfully juicy and perfectly seasoned, the phrase 'hot knife though butter' comes to mind when it came to cutting a piece off. For those that have yet to try ox cheek, I'd definitely recommend it. It just tastes so... beefy! And tender as you like; this must have been cooked for hours! The dish went down well I think, or so says the lack of, well, anything left on the plate, once the course was over. Another success then.

      Camden Kitchen, Dublin 8Spotting our creaking and slight groans, it was suggested that we might want to take a little break before ordering desserts. Good call my man! More wine was sipped and eventually we bit the bullet and ordered.

      The puds arrived within a few minutes and as soon as we smelled them, any thoughts of not being able to finish were quickly shown the door.

      I often go for the dark chocolate fondant with homemade coconut ice cream & coffee froth, but bowed out this time, opting for the citrus crème brûlée with passion fruit sorbet. Mine turned out to be a great choice; rich yet light, and full of flavour, with the tart sorbet acting as the perfect palate cleanser.

      Miss C did go for the fondant, having stared at mine jealously the last couple of times we've been here, and she wasn't disappointed. SO chocolately, this was a textbook fondant, with plenty of rich chocolate oozing out onto the plate. Clean plates all round for a third time.

      Time to try and relax; coffee with a cheeky brandy for me, and the remainder of the wine for my better half. We must have still looked peckish somehow, as our server thought it necessary to drop a couple of complimentary lavender & honey Madeleines onto our table. These are one of the standard desserts on offer here so I'm guessing rather than throw them away, it was decided to give them a good home i.e. in our bellies! A nice touch nonetheless.

      The bill came, we paid, tipped, and attempted to execute dignified waddling as we shuffled sideways out the door.

      All in all this was, as always, a great gastronomical evening of dining. I can't urge you enough to try Camden Kitchen when trying to decide where to go for something just a little bit special; trust me, you'll never be disappointed. With a total spend of €132, this clearly isn't the cheapest bites you'll ever get, but when you think that covered six dishes (SIX!), champagne cocktails, wine (€39 alone, don't forget), coffee, brandy and water, I have to say, that price is a long way off being offensive.

      And remember, if you pay Camden Kitchen anything at all, then you'll have just finished one of the best meals you'll have eaten all year. Worth every penny says I.

      I'll be back before long I hope; I'm sure my lady & I can think of a good enough excuse, even if it's just that we're hungry...


      Camden Kitchen
      3A Camden Market
      Grantham Street
      Dublin 8, Ireland
      www.camdenkitchen.ie
      https://www.facebook.com/CamdenKitchen
      +353 (1) 476 0125
      info@camdenkitchen.ie

      Sunday, 21 April 2013

      spaghetti with crab, lemon & chilli

      Spaghetti with crab, lemon & chilli

      We're all so busy these days, have you noticed? Too busy to call, too busy to relax, and certainly too busy to cook a meal. Thank The Lord that this dish only takes 10 minutes then!

      Simple, tasty, healthy (and my god, moreish), this pasta meal only uses pasta & just a handful of other ingredients, plus the obligatory olive oil of course! Have it for supper, or pile it up as a main course; either way you'll make it again & again!


      Ingredients
      • 300g white crab meat
      • Large handful of freshly chopped parsley
      • 1 red chilli, de-seeded & finely chopped
      • Zest & juice of 1 lemon
      • Large clove of garlic, finely sliced
      • 200g spaghetti
      • 3 tbsp olive oil

      Method

      1. Cook the pasta in plenty of boiling salted water until al dente (around 8 minutes) and drain.
      2. Meanwhile, heat 1 tbsp of the oil in a large frying pan (or sauté pan). Add the crab, parsley, chilli, garlic & lemon zest, and fry gently for a couple of minutes, stirring constantly to mix together & warm through.
      3. Add the remainder of the oil and the lemon juice and cook for a further 2 minutes.
      4. Add the pasta & mix well until coated with the crab sauce.
      5. Serve, eat, say yum a few times...

      Serves 2

      Thursday, 11 April 2013

      seared tuna with tuna tartare, scallops and pak choi salad

      Seared tuna with tuna tartare, scallops and pak choi salad

      When we talk about cooking with tuna, many of us think of the tinned stuff, in oil, or water, or (more trendy) olive oil. Now, that type of tuna is pretty cool in its own right of course; it's cheap, it's versatile, and it makes a great addition to a salad, stirred into a tomato pasta sauce, or just mixed with some mayonnaise and thrown on toast with tomato & cheese for a quick & comforting classic tuna melt.

      For dinner however, the fresh option will give you a whole different experience. Full of essential nutrients, fresh tuna really is something else! The texture is just amazing (the fresher the better), and can even be eaten raw (think sashimi), and the fish lends itself brilliantly well to Asian flavours.

      Price-wise, it clearly costs more than the tinned variety, but is worth every penny, and really won't break the bank - and why should it?! A little goes a long way, and I've designed this recipe to show off a couple of ways to make the most of tuna and its beautiful qualities. As a light lunch or a swanky starter, it's all good. Enjoy!


      Ingredients

      For the seared tuna
      • 1 piece of fresh tuna (around 350g is plenty for 4 people)
      • 1 tbsp soy sauce
      • 1 tbsp clear honey
      • 1 tbsp toasted sesame oil
      • 2 tbsp sesame seeds

      For the tuna tartare
      • 150g fresh tuna, diced into very small pieces (the smaller the better)
      • 1 tbsp soy sauce
      • 1 tbsp sesame oil
      • 1 tbsp clear honey
      • ½ lime, juice only
      • 1 spring onion, finely chopped
      • ½ green chilli, finely chopped
      • Salt & freshly ground black pepper

      For the scallops
      • 8 scallops, corals removed
      • 1 tbsp olive oil

      For the pak choi salad
      • 2 pak choi, cleaned and thinly sliced
      • ½ lime, juice only
      • Small handful of fresh coriander, roughly chopped
      • 2 tbsp extra virgin olive oil
      • ½ green chilli, finely chopped
      • Handful of beansprouts
      • 3 or 4 radishes, very finely sliced
      • 2 cloves of garlic, finely chopped
      • 1 tbsp wholegrain mustard
      • 1 tbsp clear honey


      Method
      1. First make the marinade for the tuna. Whisk the soy sauce, honey & sesame oil together in a bowl and place the tuna in, ensuring it gets a good coating. Leave for at least 5 minutes to soak up the flavours.
      2. Next make the dressing for the salad. Mix everything together apart from the pak choi (reserve a small amount of coriander for garnish). Set to one side.
      3. For the tuna tartare, mix all the ingredients together, seasoning to taste.
      4. To finish the seared tuna, remove from the marinade and coat in the sesame seeds. Heat a griddle pan (or non-stick frying pan) until hot, add a small amount of olive oil and carefully place the tuna in the pan. Sear on all sides and remove to rest for a couple of minutes. The whole cooking process there should only take around 2-3 minutes in total, and don't panic of some of the seeds  burn a little; they just add to the flavour & textures!
      5. For the scallops, season lightly with salt & freshly ground black pepper. Heat the oil in a frying pan until hot and cook the scallops for 30 - 60 seconds on each side, until they colour & start to caramelise slightly.
      6. Finish the salad by adding the pak choi to the dressing, making sure everything gets a good coating.
      7. To serve, place a small pile of salad on a plate. Next, slice the tuna into pieces no more than 1cm thick and place on top of the salad. Put 2 good spoonfuls of the tuna tartare on the plate and place a scallop on top of each. Finally, spoon over a little of the salad dressing and sprinkle over some of the reserved coriander.
      8. Take photos, eat, smile, wonder how you didn't make this earlier...
      Serves 4.

      Special mention once again to the guys at Kish Fish for supplying the tuna & scallops. You rock!

      Wednesday, 3 April 2013

      monkfish wrapped in prosciutto with scallops, wilted spinach and tomato & basil sauce

      Monkfish wrapped in prosciutto with scallops, wilted spinach and tomato & basil sauce


      Easter was upon us last weekend, and that all kicked off with Good Friday. Now for me, Good Friday is a bit of a tale of two stories. On the one hand the pubs are closed and we can't get hold of a pint during a long weekend, which just seems plain unfair. On the other hand though, we can stick with tradition and eat fish! Thanks yet again to the guys at Kish Fish, and even more so actually, as monkfish was one of their weekly specials!

      Monkfish is just great; one of my definite favourites, and lovely and meaty, so it can take a good roasting, yet is still light enough to handle a strong sauce. I wrapped mine in prosciutto ham, but you can use serrano, parma ham, or even good old streaky bacon.

      Ingredients
      • 200g piece of monkfish tail
      • 3-4 slices prosciutto ham (or an alternative - see above)
      • Olive oil
      • 6 scallops, corals removed
      • Knob of butter
      • Sea salt
      • Freshly ground black pepper

      For the spinach:
      • 2 bags baby spinach
      • Olive oil

      For the sauce:
      • 1 small punnet of cherry tomatoes, halved
      • 3-4 spring onions, roughly chopped
      • 1 garlic clove, crushed
      • Half a dozen fresh basil leaves, roughly torn
      • 2 tbsp olive oil

      Method
      1. Preheat the oven to 220C (fan 200C) / 425F / gas mark 7.
      2. Carefully wrap the monkfish in the ham & season with black pepper.
      3. Heat 1 tbsp olive oil in an oven-proof frying pan until hot, add the fish and brown on all sides (around 1 minutes on each side should do it).
      4. Transfer the pan to the middle shelf of the oven and roast the fish for around 8 minutes or so, until the fish is cooked all the way through.
      5. Remove from the oven (be careful, it'll be very hot), place on a board and cover loosely with foil to rest for 5-7 minutes.
      6. While the fish is resting, make the sauce. Heat the oil in a small frying pan over a medium high heat and add the garlic & spring onion. Fry for a couple of minutes until softened.
      7. Add the cherry tomatoes and basil, and cook for around 3 minutes. The tomatoes will start to break down and go mushy.
      8. That's the sauce done & can be served as it is, but I blitzed mine with a hand blender until smooth - entirely up to you!
      9. Place the spinach & oil in a saucepan over a medium heat, place the lid on the pan and cook until wilted down, stirring every 30 seconds or so. Drain through a sieve or colander.
      10. For the scallops, add 1 tbsp olive oil to a small frying pan along with a knob of butter, and heat until hot (but not smoking). Season your scallops with a little salt & freshly ground black pepper and add to the pan. Cook for 30 - 60 seconds, until they start to brown & caramelise, then turn and cook for the same time on the other side.
      11. To serve, place the spinach in a neat pile in the centre of the plate, lay slices of the monkfish on top and drizzle a little sauce over. Put 3 more small dollops of sauce around the plate and sit the scallops on top.
      12. Eat, smile, tell all your friends...
      Serves 2.

      Monday, 25 March 2013

      prawn & asparagus risotto with seared scallops

      Prawn & asparagus risotto with seared scallops

      I think we all feel a bit on the glum side at the moment, stuck in the midst of this ridiculous weather. Wet & windy is not what we want! It is, however, what we've got, so this weekend I went down the comfort food route, and made Ms Chefilepsy & I a risotto. Quick, simple, hearty, and tasty enough to take your mind off what's outside, just for a little while at least.

      I got hold of some lovely peeled fresh prawns from the guys at Kish Fish on Saturday morning (as well as half a dozen scallops, but then I just can't resist scallops!), and had some asparagus kicking about, so that decided what was going in the dish for me! You can stick in pretty much anything you want; the basic risotto is usually the same each time, with your main ingredient of choice just being stirred in towards the end.

      Ingredients
      • 200g peeled prawns (cooked or raw - I used raw)
      • 350g risotto rice, such as Arborio or Vialone Nano
      • 2 shallots, finely chopped
      • 1 glass dry white wine
      • 2 litres warm chicken or vegetable stock (I went for a 50/50 split)
      • 20 asparagus spears, blanched in boiling slated water for 4 minutes, drained & cut into 
      • 12 scallops, corals removed (optional)
      • Sea salt
      • Freshly ground black pepper
      • A few knobs of butter
      • Handful of freshly chopped flat leaf parsley

      Method
      1. Heat a large saute pan over a medium heat and add 2 or 3 knobs of butter. Once melted, add the shallots & fry gently for 4-5 mins until softened.
      2. Add the rice and stir to coat. Cook for around 3 minutes then add the wine.
      3. Reduce down a little over 2 or 3 minutes then add the first 3 ladles of stock.
      4. Stir gently (but constantly) with a wooden spoon until you can 'draw' a line in the rice without it filling up with liquid (think of Moses parting the sea!).
      5. Keep adding the stock, a ladle or two at a time, and follow step 4 until the stock has all gone. It WILL all fit, trust me!
      6. Before you add the last ladle of stock, stir in the prawns and asparagus, until the prawns are cooked & warmed through, which should only take a couple of minutes.
      7. Season to taste with salt & pepper, take off the heat and stand with the lid on for 2-3 minutes.
      8. The risotto should be lovely and creamy, not stiff & sticky, and you should stir in a few more knobs of butter at the end to increase the richness.
      9. Finally stir in the parsley & serve, garnished with 2 or 3 additional asparagus spears and 3 scallops per serving if you have them.
      10. If you've gone for the scallops option, just season them on both ends with salt & pepper, heat some butter in a pan until melted & hot (but not burnt), and fry the scallops on each end for around 1 minute, or until seared.
      Serves 4.

      Wednesday, 20 March 2013

      scallops with pea & mint purée, black pudding & rocket salad

      Scallops with black pudding, pea purée & rocket salad

      I just love scallops! Sweet, soft, indulgent-tasting flesh (not too 'fishy' for those of you who don't like fish to taste of fish!), and really good for you too! Not only that but this luxurious seafood has really come down in price recently, and finally, they're REALLY easy to cook, meaning you can have a swanky restaurant regular in your own home without too much trouble!

      Paired with some thing meaty (but not too meaty!), the succulence of scallops is highlighted even more, for the ultimate surf 'n' turf. Great with pork belly (or the more expensive venison) for a main course, or as a starter with something lighter, such as the black pudding I've paired with it here. It's a classic combination, and for one good reason: it tastes fantastic!

      Thanks again to my friends at Kish Fish for supplying the fantastic scallops!


      Ingredients
      • 6 scallops, cleaned & corals removed.
      • 6 slices of black pudding, cut to approx. 1cm tick

      For the pea purée:
      • 200g/7oz frozen garden peas
      • 2 sprigs of fresh mint
      • Small knob of butter

      For the rocket salad:
      • Good handful of rocket leaves
      • 1 tsp wholegrain mustard
      • 1 tbsp white wine vinegar
      • 1 tsp caster sugar
      • 4 tbsp extra virgin olive oil
      • 1 tbsp runny honey
      • 1 garlic clove, crushed (or chopped very finely)
      • ½ lemon (juice only)
      • Sea salt & freshly ground black pepper, to taste

      Method
      1. Bring a small pan of water to the boil & add the peas & mint sprigs. Cook for around 3 minutes, until he peas have softened & are tender.
      2. Drain the peas & mint, pick the mint leaves from the sprigs (careful, they may be hot!). Add to a blender with a knob of butter & blitz until smooth. Alternatively you can of course use a hand blender.
      3. For the rocket salad, combine all the ingredients in a large bowl except the rocket and stir well until thoroughly mixed. Finally add the rocket leaves by hand and mix together until well coated.
      4. Heat a little oil in a frying pan until hot and fry the black pudding for around 2 minutes on each side, until cooked through and crispy ion the outside. Remove from the pan and drain on kitchen paper.
      5. Add a little more olive oil to the pan, heat again until hot. Season your scallops with a little salt & freshly ground black pepper and add to the pan. Cook for 30 - 60 seconds, until they start to brown & caramelise, then turn and cook for the same time on the other side. The timing will vary depending on the size of your scallops, but even the largest ones out there shouldn't take more than a minute on each side.
      6. To serve, spoon 3 dollops of the pea purée onto a plate, then add a slice of black pudding, finally topping off with a scallop.
      7. Dress the rest of the plate with some of the rocket salad, in any way that looks pretty!
      Serves 2.

      crab salad with fresh herbs & cucumber

      Crab salad with fresh herbs & cucumber

      This salad makes a good sized starter or a lovely light lunch, and is packed with flavour thanks to the combination of freshly chopped herbs. Use fresh crab meat if you can (although tinned will do just fine too!).


      Ingredients (for 2 people)
      • 300g white crab meat
      • Handful of fresh chives, chopped
      • Handful of fresh mint, finely chopped
      • Handful of fresh basil, finely chopped
      • Handful of fresh coriander, finely chopped
      • 1 clove of garlic, crushed
      • Zest & juice of 1 lime
      • Pinch of ground white pepper
      • 3 tbsp mayonnaise
      • Olive oil
      • ¼ cucumber, very thinly sliced

      Method
      1. Place all the ingredients (except the cucumber) into a bowl and mix gently with a fork.
      2. To serve, layer the crab mixture between 2 layers of the cucumber - use a cooking ring/mould if you want to go for a bit of swanky presentation.
      3. Finish with a chive or two on top of each stack and scatter chopped chives around for an even more impressive looking plate!
      4. Enjoy with a nice glass of chilled dry white wine. Or maybe two. Or...

      Monday, 18 March 2013

      kish fish, smithfield, dublin 7

      Fishmongers in central Dublin are few & far between these days it seems. Many supermarkets stock pre-packed fish & seafood, however this is largely limited to salmon, cod, smoked kippers, prawns and mussels in a sauce or two. Whilst these still offer some good options for some lovely meals, clearly those options are somewhat limited.

      How great then when I stumbled upon Kish Fish, a veritable treasure trove of all things fishy, and located just a few short minutes from the bustling city centre. Established in 1966, this local fishmonger stocks fresh fish daily, and supplies many top class restaurants across the country.

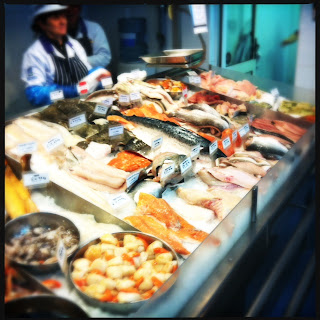
      They also have a fantastically stocked shop open to the paying public, with a range and prices to suit all palates and pockets. Stepping into the shop sees you faced with a huge range of fresh fish & seafood (check out just part of what's on offer in the photo above), as well as loads of frozen produce, ranging from squid rings, to kilo bags of scallops, to whole octopus. They also stock some ready-to-go products, including a variety of sauces and prepared fresh crab meat.

      Kish Fish are proud members of the BIM Seafood Circle and last year claimed the coveted BIM Seafood Specialist Of The Year Award (you can read more about all of that here).

      The staff are not only friendly, but they're knowledgeable too, and are more happy to offer help and advice about the produce, as well as cooking tips and recipe ideas. 

      Special offers are available as well, with great deals on a couple of fish varieties, and these change on a weekly basis. You can even sign up to receive details of the weekly offers via free text message: just text KISH to 51444. I receive mine every Thursday morning, which is great timing for my weekly Saturday trip to the shop!

      Opening hours are 9:00am - 5:30pm (Tue/Wed/Thu/Fri) and 9:00am - 2:00pm (Sat), and you can find their location & directions using the map below:


      I buy fish and/or seafood from Kish Fish most weekends, so keep an eye out on here and our Facebook & Twitter pages for more fish recipes soon!

      Finally, a big well done & thanks to all the guys at Kish Fish! Long may it continue!
      -
      Kish Fish
      40-42 Bow Street
      Smithfield
      Dublin 7, Ireland
      (Second shop also open in Malahide).
      www.kishfish.ie
      Official Facebook page


      Saturday, 2 March 2013

      baked cheesecake with raspberry compote


      Baked cheesecake with raspberry compote

      Talk about a simple recipe! This dessert is baked in the oven rather than just chilled in the fridge, so more of a New York/American style. But yep, tasty nonetheless! It isn't as sweet as a typical cheesecake so needs the extra kick & sweetness of the fresh berries I think. Preparation only takes around 5 minutes, and then just whack it in the oven to do it's thing. And the raspberry compote only takes 5 minutes too. I said it was easy didn't I?!


      Ingredients
      • 800g cream cheese (Philadelphia or similar)
      • 200ml double cream, whisked until it thickens slightly & turns glossy
      • 3 eggs
      • 25g caster sugar
      • 1 tsp vanilla extract
      • 300g fresh raspberries
      • 1 tbsp icing sugar

      Method
      1. Preheat the oven to 190C (fan 170C) / 375F / gas mark 5
      2. Lightly grease a 23cm springform cake tin with butter or oil.
      3. Whisk the cream cheese until fluffy, then add the cream, eggs, caster sugar and vanilla extract, and mix in until well combined.
      4. Pour into the cake tin & place in the middle of the oven for around 40 minutes, until the cheesecake starts to colour on top. It may also crack a little but that's completely normal!
      5. Allow to cool completely in the tin (it will firm up a little and make slicing much easier).
      6. For the compote, just place the raspberries in a small pan with the icing sugar and heat up over a medium heat, stirring occasionally. The raspberries will soften & start to turn mushy - that's when they're done!
      7. To serve, place a slice of cheesecake on a plate and drizzle the warm compote on & around, before getting stuck in.
      Serves 10-12.

      Wednesday, 27 February 2013

      squid with lemon & chilli

      Grilled squid with lemon & chilli


      This is a recipe I picked up when I was living in Spain and ticks all the boxes: It's fresh, it's cheap, it's healthy, and above all, it's tasty! And it smells fantastic when you're cooking it! Squid is low in calories and is high in nutrients such as Vitamin A, potassium and calcium. And at around only €8/kilo, it makes for an incredibly economical ingredient. So don't be scared by fresh squid, and give this a go. It's a much nicer alternative to deep fried, battered (rubbery) squid rings!


      Ingredients
      • 4 fresh squid, cleaned & prepared*
      • 1 red onion, sliced
      • 2 red chillis, de-seeded & sliced very thinly
      • 500g new potatoes
      • 2 cloves garlic, chopped
      • Juice of 2 lemons
      • Large handful of fresh mint, chopped
      • Large handful of fresh flat leaf parsley, chopped
      • Olive oil
      • 4 knobs of butter
      • Sea salt
      • Freshly ground black pepper

      *To prepare my squid, I usually put slices though it, but be careful not to go all the way across. To do this safely, just lay a large knife inside the squid, and slice across with a second knife, then repeat on the other side. The knife inside the squid will act as a barrier to stop you cutting all the way through and ending up with squid rings! This technique is great for getting all the other flavours into the squid, and looks professional too!


      Method
      1. Place the potatoes in boiling salted water & cook for around 8 minutes, until starting to get soft. Drain and leave to dry in their own steam in the colander.
      2. When the potatoes have cooled slightly, heat 2 tbsp olive oil and 2 knobs of butter over a medium high heat in a large heavy frying pan, and add the potatoes, crushing down slightly with a wooden spoon or a masher.
      3. When the potatoes are starting to colour nicely, make space in the pan and add a drop more olive oil, along with the red onion.
      4. Cook until soft, then remove the potato & onion mixture and keep to one side in a warm dish.
      5. Add a little glug of olive oil to the pan. Season the squid lightly on both sides and fry for around 2 minutes on each side; you should see the squid starting to lose it's opaque look.
      6. Add another couple of knobs of butter to the pan along with another glug of olive oil and add the chilli, garlic and parsley. Toss around so all the flavours get into the squid. Pour over half the lemon juice, a little more seasoning to taste, and toss again to make sure everything gets a good coating.
      7. Put the potatoes & onion back in the pan and again, toss around to make sure everything picks up the flavours of everything else.
      8. To serve, place the potatoes on a large platter and lay the squid on top.
      9. Finally, squeeze over the rest of the lemon juice and sprinkle with the fresh mint.
      Serves 4.